The Matrix of Color
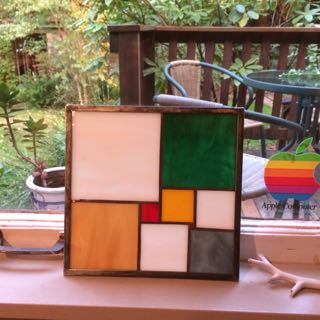
I played with geometry when I was young, drawing and coloring various designs. By the 1980's the windows of my own house were filled with a matrix of clear color samples, a mandala, and Apple Computer rainbow decals.
Stained Glass Glass projects presented in (approximate) chronological order...
I played with geometry when I was young, drawing and coloring various designs. By the 1980's the windows of my own house were filled with a matrix of clear color samples, a mandala, and Apple Computer rainbow decals.
For years I'd wanted to make a door at the top of an open stairway. I imagined a small stained glass panel in the door, but I had no experience cutting glass, and no knowledge about stained glass techniques — leaded windows vs artsy lampshades for example.
So, in May 1999 I took an evening class from Tony Tomlinson at his Glass Circus shop in Multnomah Village. The first class Tony said not to be afraid of getting cut, and then drew a little of his own blood to ease our apprehension. He then showed us where the band-aids were! (Now that's a teacher!)
It was a whole new world of specialized tools and arcane techniques. See the sidebars (below) for what I've discovered so far.
From the class and the projects I've done since, I've learned:

Initially, my class project (The door window) was going to be small, but the other students and Tony told me to think bigger, so I made it more door-sized than peep-hole sized. I had to come up with a design before the next class! The geometry had to be done quickly, but good enough to live with. I figured if it didn't turn out well, I could make a different one later. To keep the cost down, I scrounged as much as possible from Tony's scrap bin and supplemented that with some new glass. The window came out fairly well, but the custom slant-topped door never got made!
(Another picture shows the clear peep holes and the color of the border. Glass is hard to photograph!)
See the Transom panel at the end — made for above a dutch door in Time Haven.

As luck would have it, my son & I built a playhouse that same summer. It needed three windows. I had some window glass but it wasn't big enough, so I expanded two of them by adding plain glass to the top, bottom and sides, and colored accents in the corners. On the third window, I tried to top Frank Lloyd Wright, spending family money for glass. My hobby was becoming an obsession!
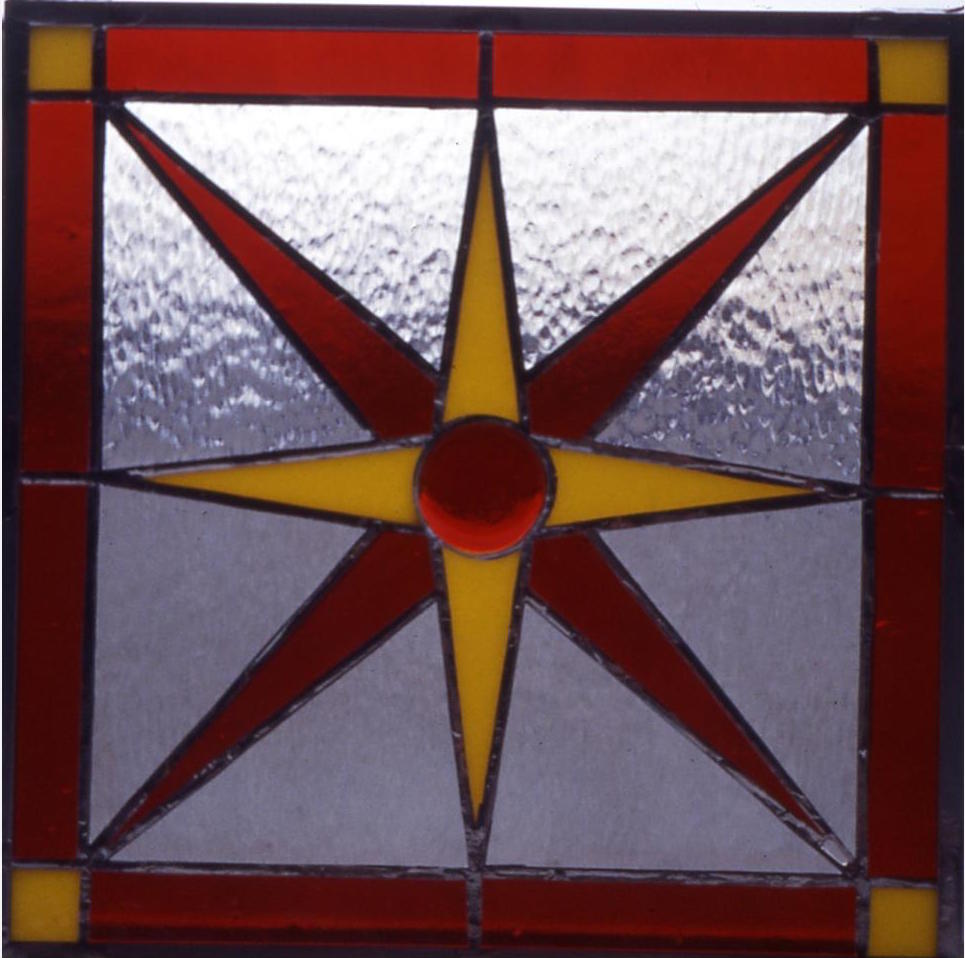
While in Philadelphia in 2002 I was intrigued by a star design for sale in Grinds & Finds, a neighborhood antique and coffee shop. I sketched its geometry best I could. I don't know the origin of the pattern. I used the Metro holiday fund raiser as an excuse to make the first one, and another for my son's middle school fund raiser in April 2003. They went for a half to a third of the price in Philly, so I'm not likely to do more for fund raisers!

After that star exposed my hobby, Joe Gross (co-worker at Metro) commissioned me to make a lighthouse for his wife's birthday. I found a good working image of the Yaquina lighthouse that had the horizon in a pleasing proportion, and translated it into a glass design. Finding the right glass to use is often the hardest part because all the textures and colors have to work together to create the desired effect. In this case, the sky and ocean glasses were great finds. The white had to have shadows and red lead roof was hard to match. I spent the longest time choosing them.
My first design for the Lighthouse had 108 pieces. When I realized it had too many tiny ones in the lantern room, I reduced the total to 85. When I went shopping, I found a 1.5″ jewel-cut glass round. By incorporating it to represent the lighthouse lens, I reduced 16 other pieces to 4, for a final design and panel of 73 pieces.

My nephew lives with his young family on a prairie north of Spokane at the edge of a farmer's field. The twin fir trees seen from the window above were going to be cut down for safety reasons. It was a favorite view of mine, so I secretly had my sister take a picture out that window. When I got the photo, I made the sketch below.
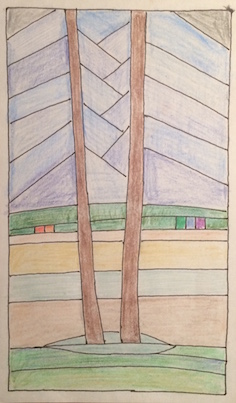
Originally I thought I would reproduce the tree branches as they were, but I quickly gave that up and began experimenting with other branching patterns. I saw that I could weave overlapping branches into a pyramid motif that allowed for different colors. Instead of having a uniform sky, I chose shades of violet, blue, and gray to represent changing weather, and two dark corners to hint at the night. I thought the pyramid shapes also suggested the mountains in the area.
I'd seen the field plowed, I'd seen it green, and in summer it was the blondish yellow of ripe grain or mustard seed... I thought why not show all the seasons? Then I realized that the prairie was covered with snow part of the year, so I added a white layer. When shopping, I found a brown ridged glass that could be used vertically for the tree bark, and horizontally for the plowed field.
I could see farm buildings on the edge of the field in the photo, but I couldn't represent that detail in glass. Instead, I added five squares to represent the family (parents and three boys) using their birthstone colors. I presented the finished panel as a surprise along with a video tape showing the project in different stages of development. It now hangs in that window, and the family sees it every day. Gus, my son, helped put the foil on the pieces of this project, and the lighthouse.

My last two projects were images rather than geometric designs, perhaps because of the glass-like Kootenay Lake where we vacationed the summers before and after my class - that has shifted my interest somewhat from geometry to nature.

I made this project all in one day – from original design to finished project — for a longtime friend in Spokane.
Can be viewed upside down. It's a Geometric Image.

Done for a fundraiser at Metro, February, 2006. Sharon Martin bought it!

Representing the network of people who worked together to try to Find Mark.
I started out intending to design a broken heart brought together again, a cartioid with a jagged fracture generating the geometry. But Polygon Flux had just been published on January 11th, so I naturally cast the heart as a polygon, symbolically choosing 15 sides — 7 on one side, 8 on the other. From there, filling the heart with an array of triangles came naturally. I carried each of the heart's vertices to the frame, radiating from the center area of the heart. Geodesic arcs appeared through and across the Heart, and the design became whole.
Here's a photographic record of the process. [LINK].

For Julie, on Mark's Birthday, April 2012.
33 unit x 32 unit perfect squared rectangle, crudely made for Elwyn B's visit to Portland.

Patterned after Sellwood Pioneer Church main window. Made as wedding gift for my son! Shown here before Zinc frame was added.
Interesting to count the pieces. There are 5 blocks of 8, plus 3 more on each end. I have the steps of this piece photo-documented, same as some others.
Also, recently, I couldn't resist making a five-pointed red and white star to put in the window at xmas... and a small yellow & blue Ukraine flag. Not framed permanently with zinc.. just for fun.
After I completed the lighthouse project, I realized that the pieces for a more detailed lantern room could be 'fused' into one piece and that single piece could be incorporated into the panel. So, at the time, I thought I would take take a glass fusion technique class. In May 2013, I had a weeklong Glass Fusing and Painting with Peter McGrain and learned a superior technique that I have yet to explore.
The success of my lighthouse design led me to think of other Oregon landscapes and landmarks that would be appropriate for glass — Multnomah Falls, the Columbia Gorge, Old Growth Forests, Crater Lake, Mount Hood, and so on. I'll call these images my Oregon Series. I will design them and select the glass for them all at once so the series will have a distinctive style. Probably using landscape and portrait orientations of 11″ x 17″ or 12″ x 18″ — whatever will fit in the kiln I don't have yet. LoL. I plan to use Peter McGrain's technique for this series.
I thought I would make sconces for our home using the copper foil technique, and a Prairie Lamp (such as Frank Lloyd Wright) perhaps with a pyramid twist to it. (Oops, I bought once ready-made sconce, used!)
Door window panel for an existing interior dutch door.
Geometric design, larger version of Gothic Trees, for back bathroom window. There is already a clear pane set in. The glass panel would set inside that, and I would put some desiccant packets in between to absorb any moisture that will invariably be pulled in to the void.
As implied above, translating an image or an idea into a design that 'works' in glass can be challenging, as is finding the right colors and texture of glass that work together to create the color and shading desired in the design.
Here are the fundamental things I leaned about executing a design.
There are four main methods of assembling glass once it is cut and ground.
Copper Foil - Tiffany invented the process of putting glass together by covering over the edges of glass pieces with copper, assembling them into a design, and soldering them all together. He ground the cut glass edges by hand, hammered his own copper strips and made his own glue for the copper. Today, you can buy copper foil tape in different widths for your glass and use a motorized grinder.
Lead Came - Old fashioned Stained Glass windows are put together with Lead "Came", lengths of grooved lead just big enough to join pieces of glass. (Origin of word "came" is unknown.) Came comes in different widths and kinds to fit various thickness of glass, to appear wide or narrow, to be placed between pieces or at the edge of a panel, and so on. The Came is soldered only at the nodes (junctions) of the design. Glazing compound is worked into the lead-and-glass assembly to weather-proof it and make it more solid. Fusion - Must use "fusible" glass. Glass pieces are cut and laid out on a ceramic tray. Then fired in a kiln... People make plates, bowls, and panels this way. You can also place the pc on a single pc of clear and fuse it all to make a thicker panel. Mosaic - Glass pieces are epoxied onto sheet glass or cement, then the spaces are mortared. Example: Paul Bunyan and Babe in the Blue OX bar at Timberline Lodge by WPA artist Virginia Darce.Tony closed The Glass Circus, and for a while taught classes via Cline Glass, including glass fusion. On 3/15/16, I discovered a sign WE ARE GONE on Cline's door. Boo!
The Bureau of Land Management recently announced that the Yaquina Lighthouse roof will be restored to its original black!
My glass work was suspended in 2004-05 while I remodelled our main bathroom. The shower stall and one whole wall is covered with slate.
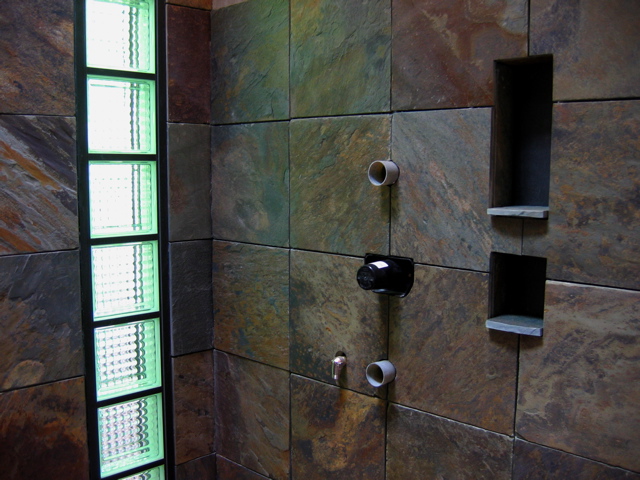
In that process I noticed the similarity between slate and glass. You have to design the pattern, cut the slate, and grout the lines. The sound of slate being cut reminded me of grinding glass with diamonds.
Stay tuned for more. My goal is to get back to glass, but using Glass Fusing and Painting with Peter McGrain's Vitri-Fusâille™ process. Here are my notes on a workshop I took: [LINK].